> ## Documentation Index
> Fetch the complete documentation index at: https://help.shodanpro.com/llms.txt
> Use this file to discover all available pages before exploring further.
# 案件を管理する
## この機能でできること
営業の「案件」を一覧で管理できます。案件を追加し、商談の進み具合(ステージ)を変え、詳細を開いて内容を確かめられます。
## 使う前の準備
特にありません。
## 手順
### 1. サイドバーの「案件」を押す
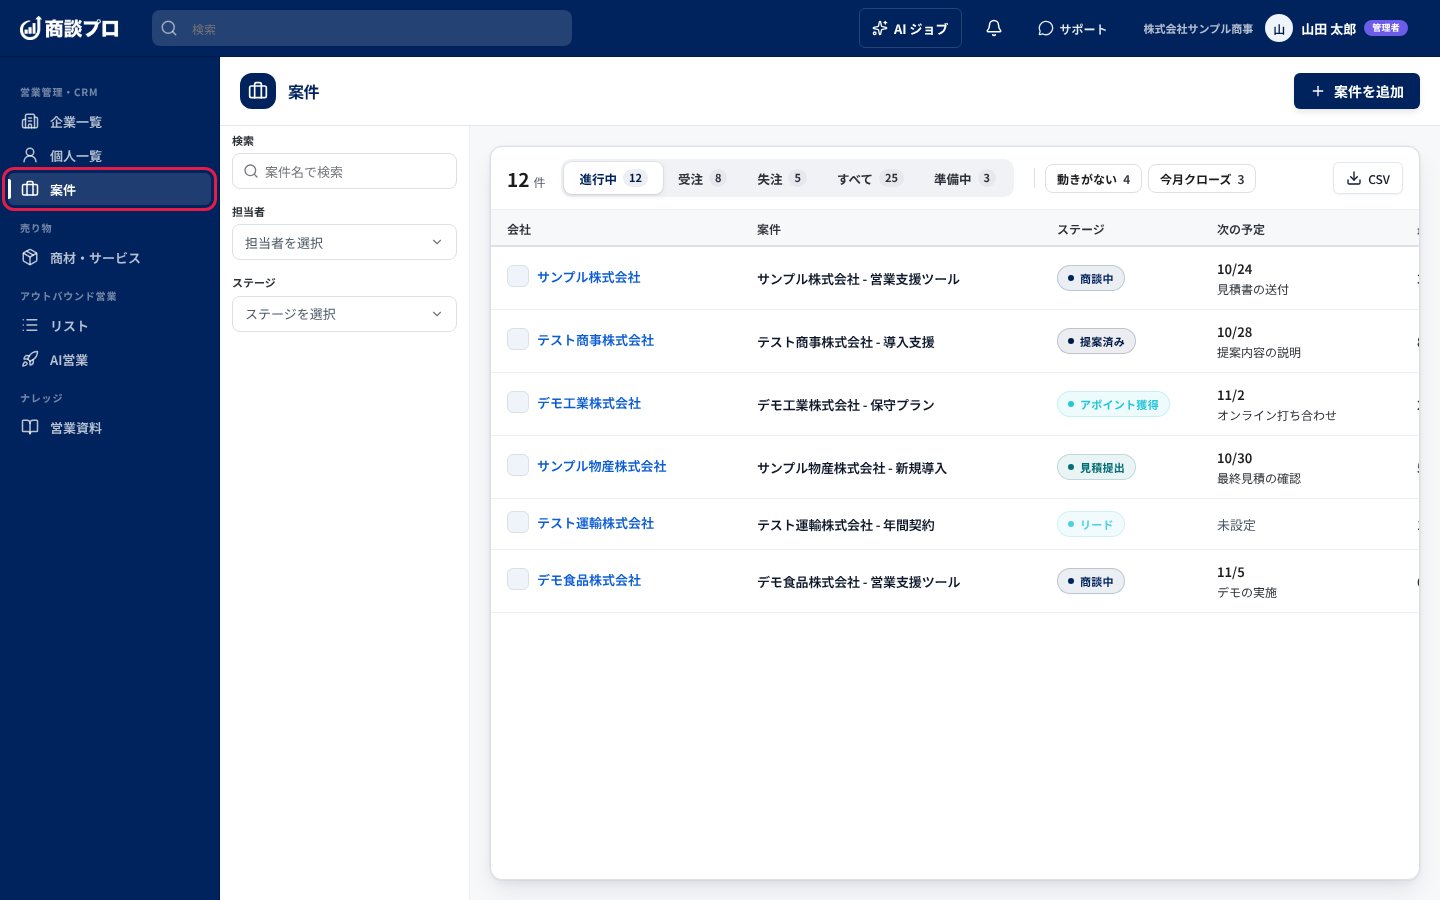 案件の一覧が開きます。上の「進行中」「受注」「失注」「すべて」「準備中」で、見たい状態の案件に切り替えられます。左の「検索」「担当者」「ステージ」でも絞り込めます。
### 2. 「案件を追加」を押す
案件の一覧が開きます。上の「進行中」「受注」「失注」「すべて」「準備中」で、見たい状態の案件に切り替えられます。左の「検索」「担当者」「ステージ」でも絞り込めます。
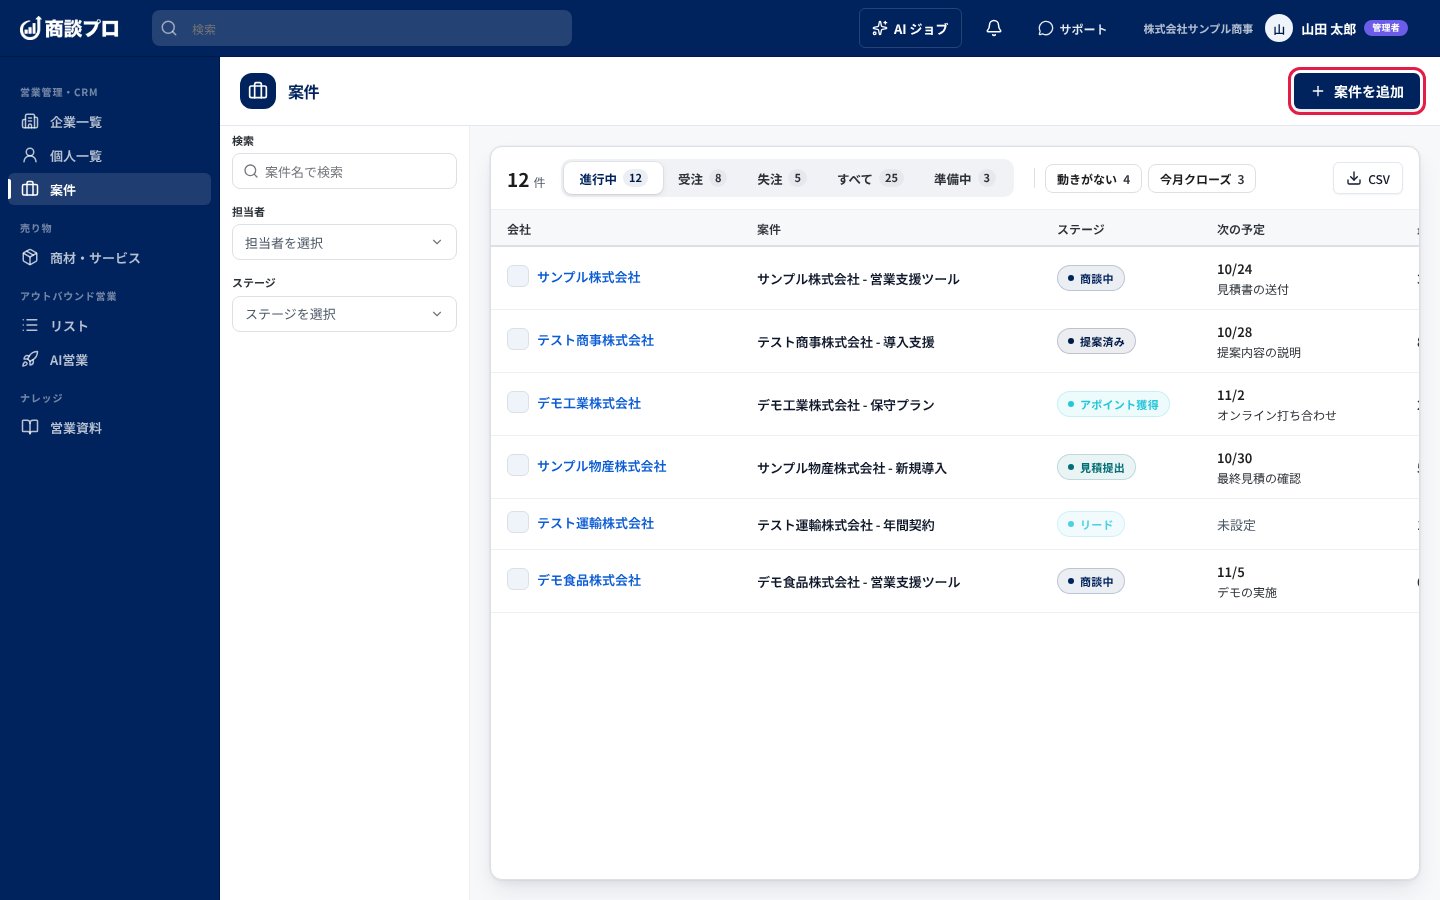
### 2. 「案件を追加」を押す
 ### 3. 内容を入れて「追加する」を押す
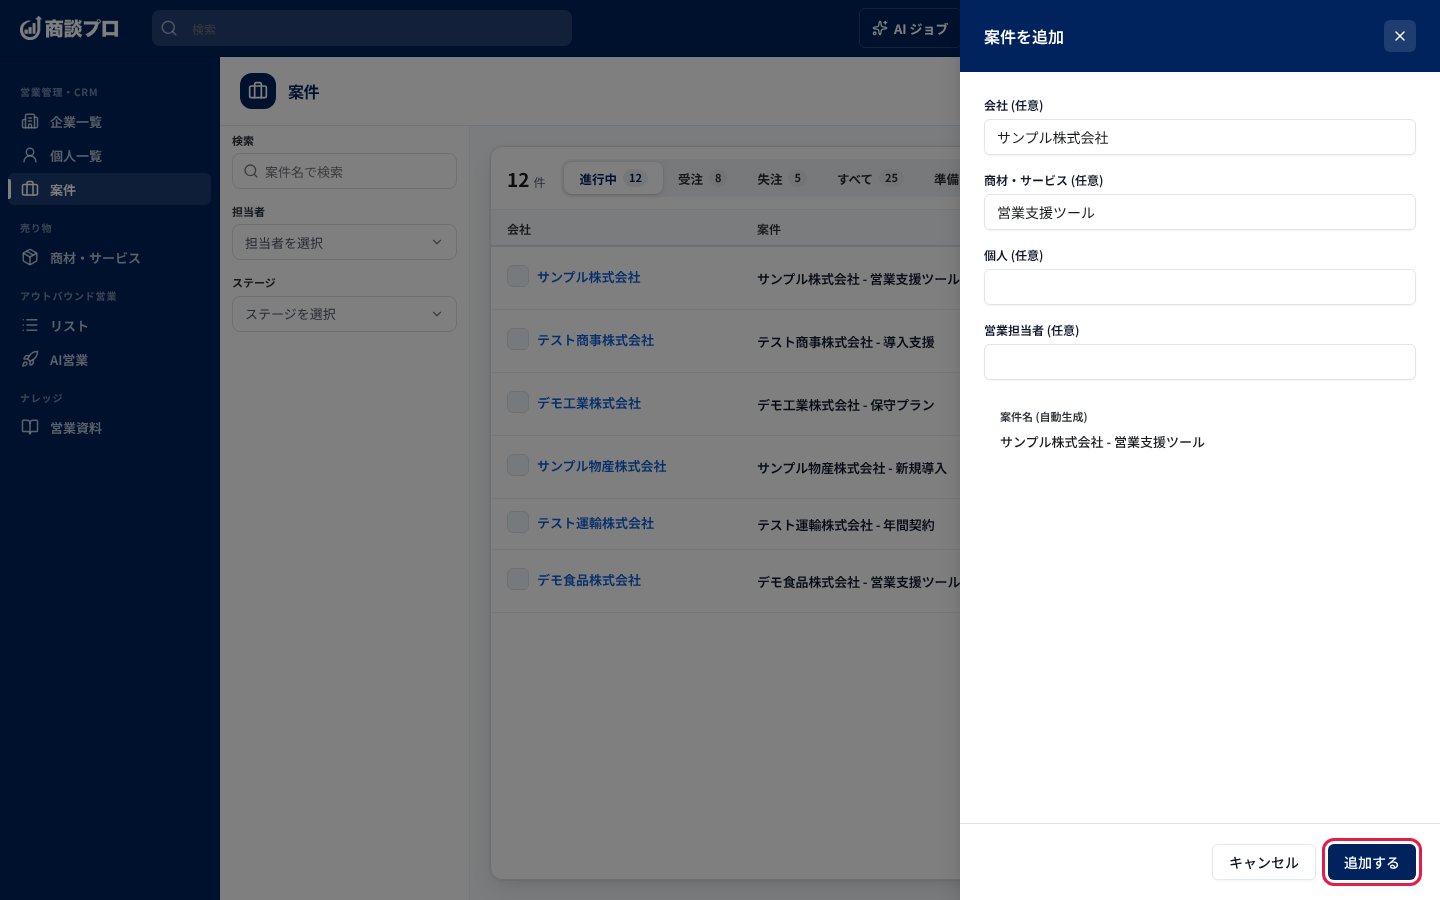 「会社」「商材・サービス」「個人」「営業担当者」は、どれも任意です。会社と商材・サービスを選ぶと、案件名が「会社名 - 商材名」の形で自動で付きます。
### 4. 一覧のステージを押して、移したいステージを選ぶ
「会社」「商材・サービス」「個人」「営業担当者」は、どれも任意です。会社と商材・サービスを選ぶと、案件名が「会社名 - 商材名」の形で自動で付きます。
### 4. 一覧のステージを押して、移したいステージを選ぶ
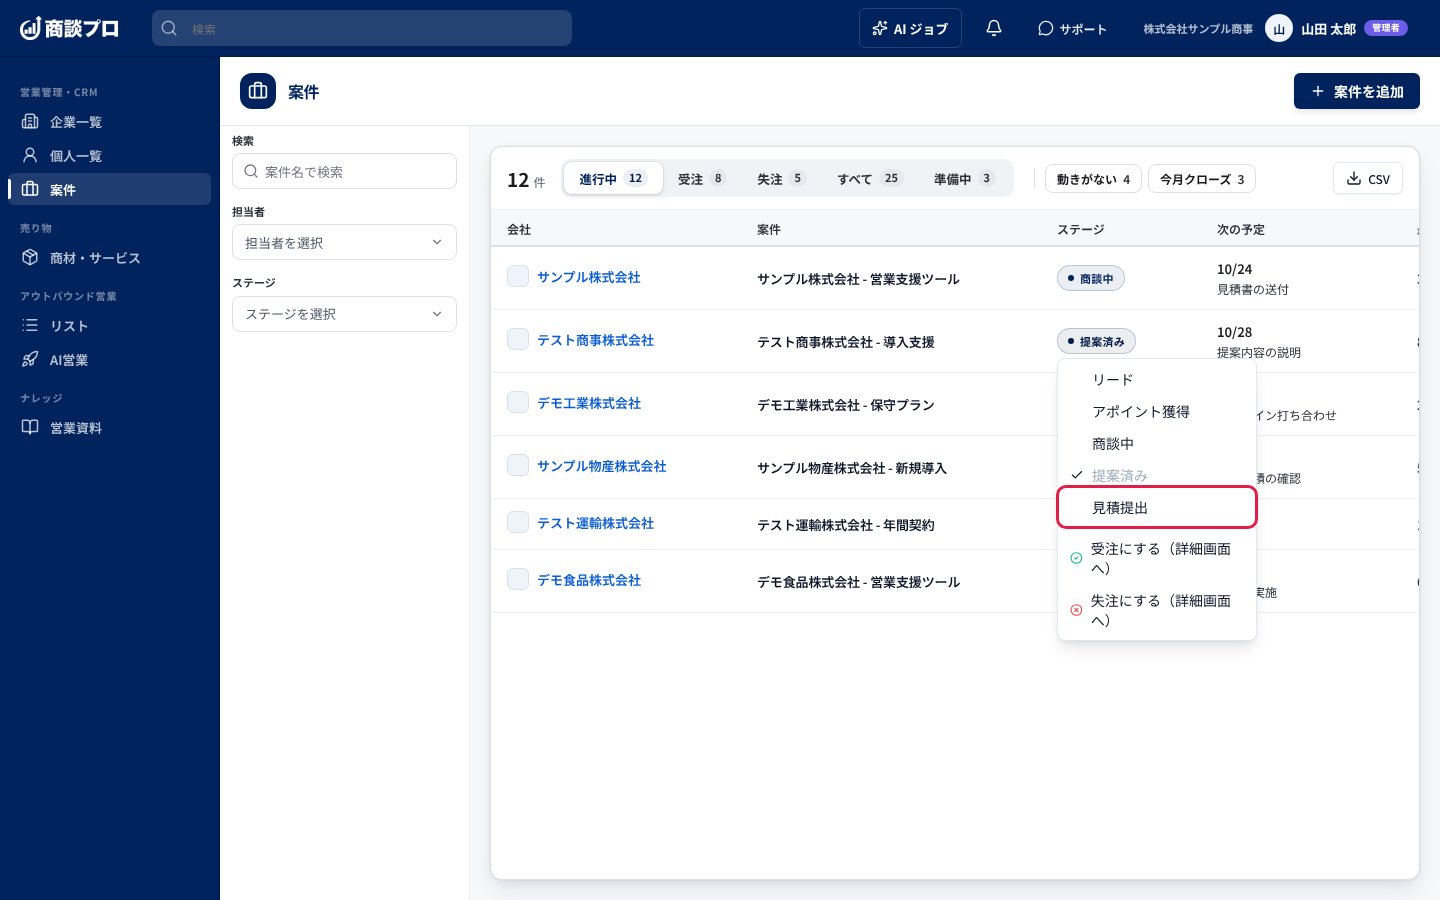 進行中の案件は、ステージの表示を押すと、ほかのステージが一覧で出ます。いまのステージは選べません。
### 5. 案件の行を押して詳細を開く
進行中の案件は、ステージの表示を押すと、ほかのステージが一覧で出ます。いまのステージは選べません。
### 5. 案件の行を押して詳細を開く
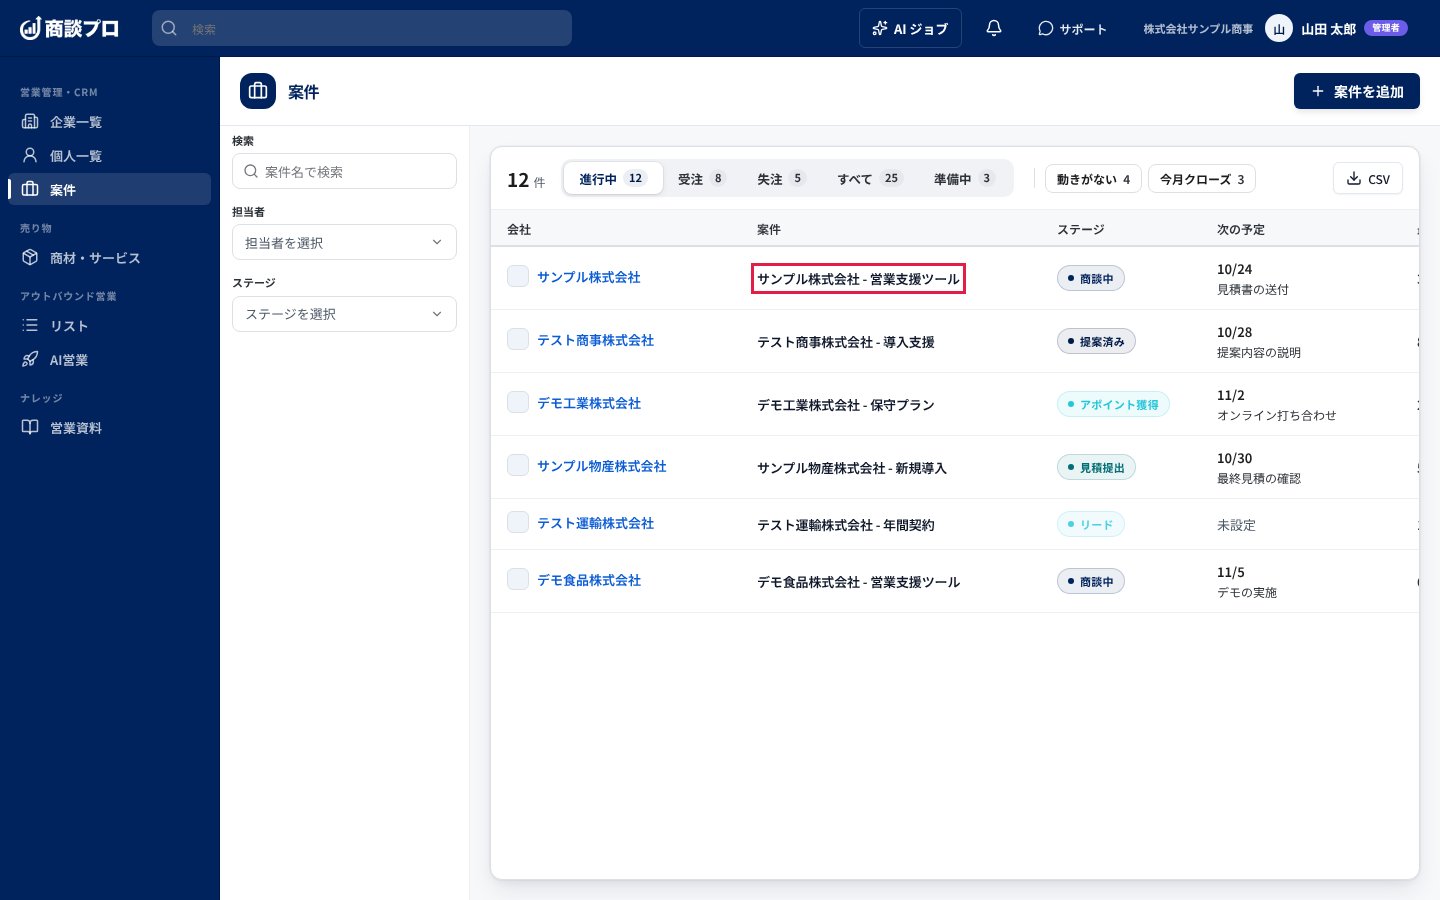 案件の詳細画面が開きます。「案件情報」「商品」「AI商談」の3つのタブがあります。左上の「一覧に戻る」の表示を押すと、一覧に戻れます。
### 6. 詳細画面で、ステージの帯を押す
案件の詳細画面が開きます。「案件情報」「商品」「AI商談」の3つのタブがあります。左上の「一覧に戻る」の表示を押すと、一覧に戻れます。
### 6. 詳細画面で、ステージの帯を押す
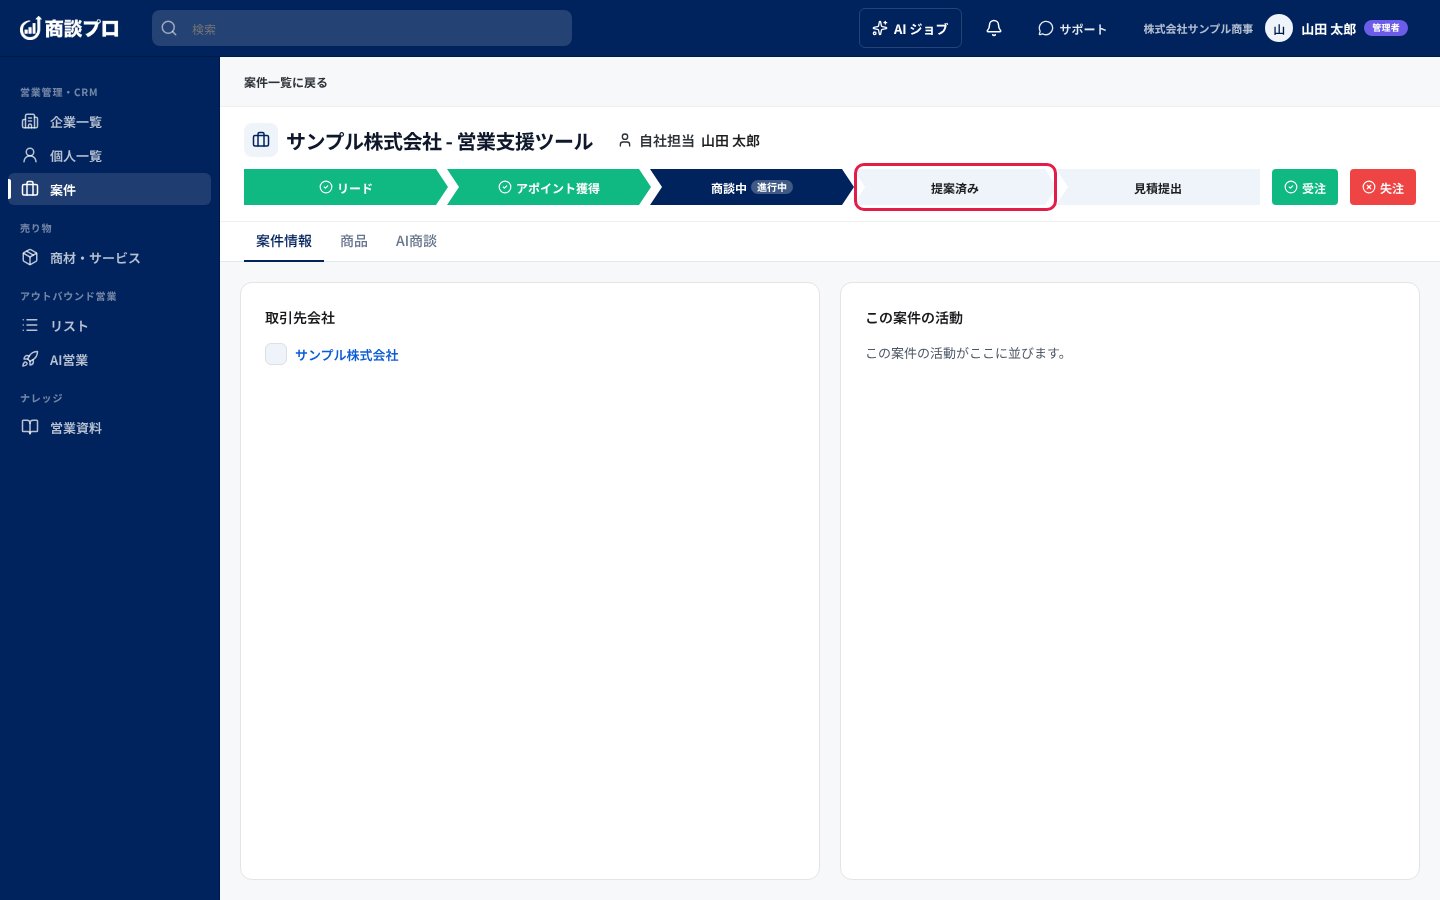 帯の中で、移したいステージを押すと変わります。右の「受注」「失注」を押すと、案件の結果を決められます。
## つまずきやすい点
* 一覧のステージの表示から「受注にする(詳細画面へ)」「失注にする(詳細画面へ)」を選ぶと、案件の詳細画面が開きます。受注と失注は、詳細画面で行います。
* 「準備中」は、メールなどで接触したものの、まだ商談になっていない案件です。商談が始まったら、案件を開いて「案件にする」を押すと、進行中の一覧に表示されます。
* 受注か失注になった案件は、詳細画面にステージの帯が出ません。結果を示す帯が出ます。
This documentation is built and hosted on [Mintlify](https://mintlify.com), a developer documentation platform.
帯の中で、移したいステージを押すと変わります。右の「受注」「失注」を押すと、案件の結果を決められます。
## つまずきやすい点
* 一覧のステージの表示から「受注にする(詳細画面へ)」「失注にする(詳細画面へ)」を選ぶと、案件の詳細画面が開きます。受注と失注は、詳細画面で行います。
* 「準備中」は、メールなどで接触したものの、まだ商談になっていない案件です。商談が始まったら、案件を開いて「案件にする」を押すと、進行中の一覧に表示されます。
* 受注か失注になった案件は、詳細画面にステージの帯が出ません。結果を示す帯が出ます。
This documentation is built and hosted on [Mintlify](https://mintlify.com), a developer documentation platform.